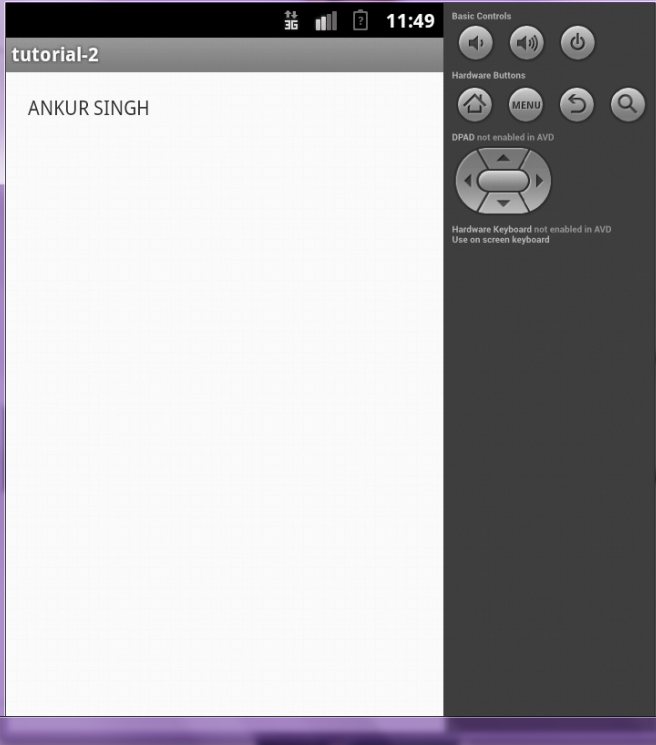
Hey there, Welcome to AndroidPlus. In our last tutorial we learned how to install Android SDK and Eclipse in your system. Today, we are going to develop our first Android App. you can say it a “Hello World” App. We will see the different types of files that are going to use in our project like XML, JAVA etc. and what is the use of these files. Finally, we will learn to run our first app in emulator as well as in your android mobile if you have one. Follow the following steps to create the first app:
STEP 1- CREATING THE ANDROID PROJECT
Follow the following steps to create your project:
- Run Eclipse go to File-->New-->Project.
2. Now in new project tab select Android-->Android Application Project.
3. Give the name for the application, Project name and package name. Each application always has unique package name. Select theminimum SDK version, Target SDK, Compile with and Theme as shown in screenshot. Here, I have selected Android 2.3 (Gingerbread), you can select the version you have downloaded.
4. Now for next few windows select the settings as shown in screenshots.
Here, we are using blank activity in later tutorials we will learn to work on full screen activity.
5. In package explorer you can see the different folders like ‘src’, ‘gen’, ’assets’, ’bin’ etc.
6. In these folders we only have to concern with ‘src’ folder, ‘res’ folder and ‘gen’ folder. For now forget about all the others folder. Now Let us look at these folders and what type of files they contain:
- SRC FOLDER: It is source folder. It contains the different packages and each package contain the different java classes.Where each class shows the activity of that class and each activity show the different methods used in that activity. Like ‘onCreate(Bundle)’ is a method.
Now double click on ‘MainActivity’ class to open. You can see the java code.
- GEN FOLDER: This folder contain the package and java files which build automatically by the system. You can see two java files in it, BuildConfig.java and R.java.
BuildConfig.java file is necessary for debugging of the project where R.java files contains all the ID’S used, attributes used, Any media files used etc. with their address.
- RES FOLDER: It is resource folder. It contains the folders which contain your media files such as images, audios, videos etc. this folder also contains the XML files. XML files helps you to make and edit the layout of the app. It is more likely to CSS to design the screen. You have to add the xml files in layout folders only.
 |
| XML VIEW |
You can either directly drag different buttons, text views etc. in graphical layout or you can write the code in xml file. Let’s try to understand the bit of the code-
<TextView
android:layout_width="wrap_content"
android:layout_height="wrap_content"
android:text="@string/hello_world"/>
Here, ‘TextView’ is an area in our layout, used to show any text. layout_widthandlayout_height are defined as “wrap_content” it means that it wrap the text view and take space or area of the text. See the example:
“android:text” shows the text or string in the textview.“@string/hello_world”refers to string available in values folder with id as ‘hello_world’. To change the string from“Hello world” to another replace android:text=”@string/hello_world”to this:
android:text=”your name”
7. Go to File-->save all.
STEP 2- RUNNING YOUR ANDROID PROJECT
METHOD#1: RUNNING ANDROID APPLICATION ON EMULATOR
To run your project in an emulator you first need to create the virtual device first. Follow the steps to create a virtual device:
1. Go to Window-->Android Virtual Device Manager.
2. Create a new AVD by clicking new.
3. Enter the AVD name, Select Device, Target as shown in screenshot.
4. Your virtual device is created, To run your code go to your folder name right click on it, then Run As-->Android application.
5. Now you can see the virtual device running and application will automatically run on the virtual device.
METHOD#2: RUNNING ANDROID APPLICATION ON ACTIVE DEVICES (ON YOUR ANDROID MOBILE)
To run the source code as application on your mobile follow these steps:
1. In your mobile go to Settings-->Applications-->Development. Check the USB debugging.
2. Connect your mobile with your System using USB cable.
3. Right click on your project folder then Run As-->Run Configurations.

4. Go to ‘target’ tab, check ‘Launch on all compatible devices/AVD’s
5. Click apply and run.
6. Application will run in your android mobile.
Guys, that’s it for today, now you have the basics knowledge of the files used in an android application. You learned what is package, what are classes, what are methods, what is XML file etc. You also learned to run the application in virtual device and in your android mobile as well.
In our next tutorial we will learn more about the XML. We will learn to design few screens, learn to include media files such as audio, images etc. we will create the form screen and much more. Hope you understood the tutorial very well, In case you get any difficulty leave your comment.


im tired of hello world tutorials
ReplyDeletewait for some time i am taking these tutorials step by step you'll definitely get some interesting tutorial.
DeleteHey Ankur, I would like to tell you one thing, I am in android market from last three years and obviously in my starting days I learned android online but I am telling you buddy, I never ever seen such a beautiful way of explaining the things.
ReplyDeleteI mean I took around 1 year to find how to run application in mobile device directly from the eclipse. but here, this is the most simplest way of explaining like a personal tutor.
God bless you buddy, keep it up!!!