Hey there! Welcome to AndroidPlus. Are you ready for an adventure of developing android apps? Making an Android App is very easy even if you don’t have any programming background. Today, we will learn how to setup eclipse and android SDK for developing the apps.
You need to follow the following steps to get started for android development-
1. Download Android SDK for windows.
2. Run SDK manager to download platform versions.
3. Download Eclipse.
4. Install android plugins for eclipse.
Note: please be sure that java SDK is already install in your system otherwise download the java SDK from here:
Click on ‘Download JDK’ button and then select your windows version to start downloading.
STEP 1- DOWNLOAD ANDROID SDK
Go to the given link and select your windows version and click download:

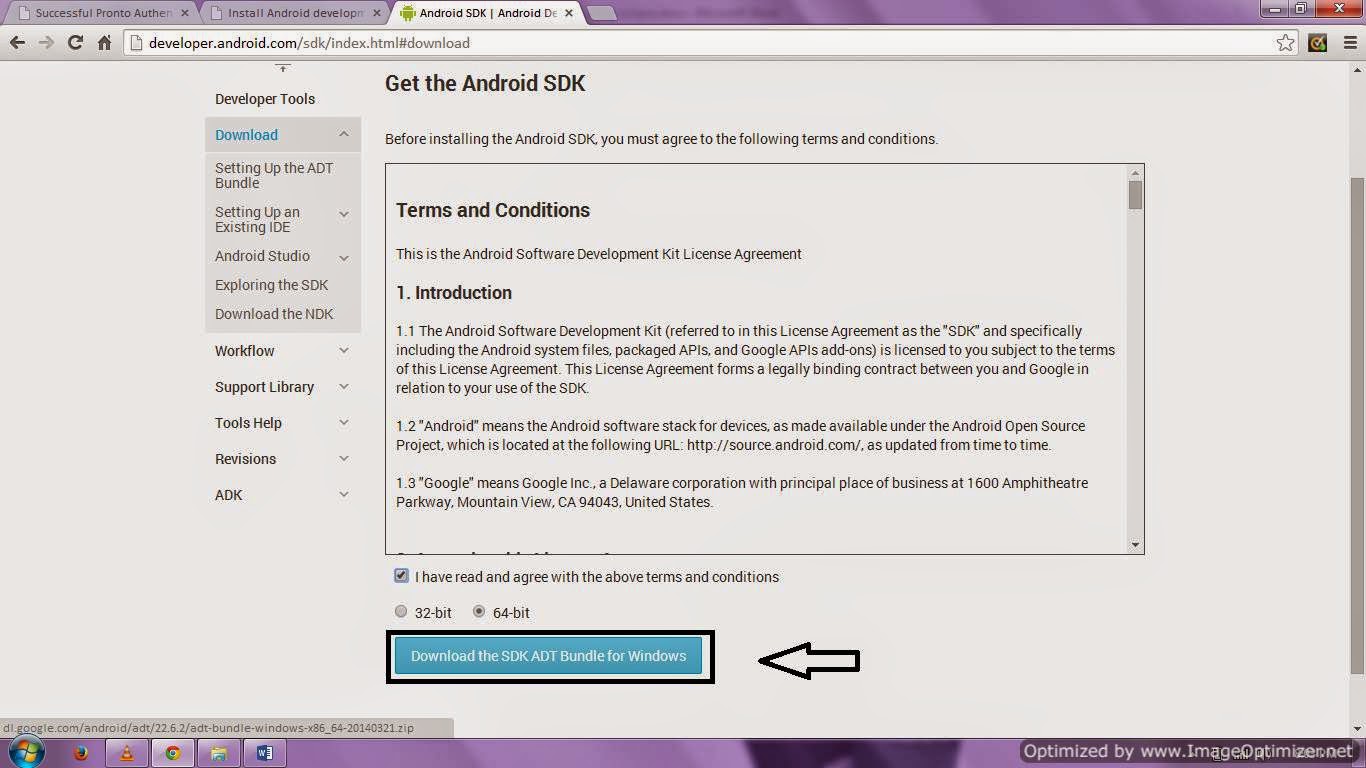
When the download get complete, unzip the downloaded file in any location.
STEP 2-RUNNING SDK MANAGER
You could see an executable file “SDK Manager.exe” where you have unzipped the files. Run this file for downloading the android platform versions. Now you could see the different available packages. You can choose any of the available package.
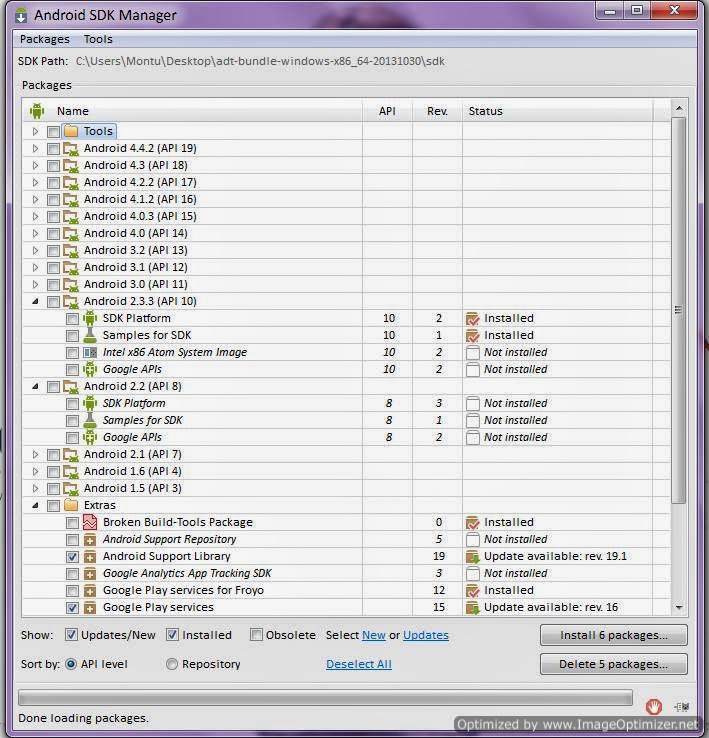
For this tutorial series I would suggest you to download the android 2.3.3(API10) also check and install the Tools (Android SDK Tools and Android SDK platforms-tool).
STEP 3- DOWNLOAD ECLIPSE
Go to the given link and select your windows version and click to start download:

You don’t have to install eclipse just unzip the files in a folder and that’s it you are ready to use it.
STEP 4- INSTALLING ANDROID PLUGINS
You need to install some android plugins before creating any android project. Follow the following steps-
1. Run eclipse, choose your workspace (accept the default). Your all projects file will be save in this folder.
2. Go to help menu --> install new software.
3. Click Add.
4. Type a name let’s say ‘Android’ and paste this address in location area https://dl-ssl.google.com/android/eclipse/
5. Click ok.

6. You can now see a list in developer tools, select Android DDMS and Android development tools and click next.

7. Continue with install and download. In the end you will be asked to restart the eclipse.
8. When eclipse get restarted go to windows--> preferences-->android.
9. Now using browse button search the SDK location. It is the same location where you have unzipped the android SDK file.

10. Click ok after that you can see the list of SDK you downloaded earlier. Click apply and ok.
Guys that’s it, you done a great job today! You have downloaded all the necessary files and setup the eclipse for the Android app development.
In next tutorial we will create our first android app. Hope you followed the tutorial step by step.
In case you get any problem related to downloading SDK or eclipse or setting up the eclipse please feel free to comment.
In next tutorial we will create our first android app. Hope you followed the tutorial step by step.
In case you get any problem related to downloading SDK or eclipse or setting up the eclipse please feel free to comment.
nice article :)
ReplyDeleteGreat Article!!
ReplyDeleteDefinitely help beginners to easily install android sdk eclipse
This is a complete guide for android sdk... You have mentioned each & everything regarding android sdk... Developers can easily understand this post...
ReplyDeleteconference management application