
Hello Guys, Welcome to AndroidPlus. In our last tutorial we learned about the XML and Java Activity Class. Today we will do something new, we will create a splash screen in our last application. A splash screen is nothing but a temporary screen which runs for few seconds whenever an application starts. Generally in most of the Apps splash screen runs with some music in the background and with an image. So let’s start making our first splash screen.
Creating XML Layout
1. Add XML file in your layout folder and name it as starting.xml.
2. Copy the below code in your starting.xml file.
<?xml version="1.0" encoding="utf-8"?>
<LinearLayout xmlns:android="http://schemas.android.com/apk/res/android"
android:layout_width="match_parent"
android:layout_height="match_parent"
android:orientation="vertical"
android:background="@drawable/home"
>
</LinearLayout>
*(learn how to add xml files in layout folder
)
)
2. Copy an image into your res-->drawable-hdpi (or only drawable) folder.
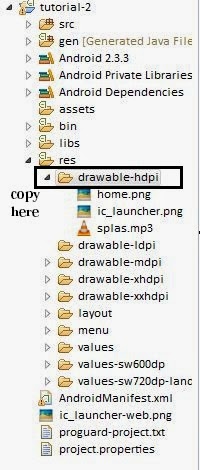
3. Also copy an MP3 file in the same folder. You can also create another folder and copy the MP3 file in that folder.
Here,
Android:Background is taking the image from the resource folder and setting it as the background of the layout.

Creating Java File
1. Add a java file in your source folder and name it as Splash.java.
2. Add the following code in your Splash.java file.
package com.example.tutorial_2;
import android.app.Activity;
import android.content.Intent;
import android.media.MediaPlayer;
import android.os.Bundle;
public class Splash extends Activity{
MediaPlayer oursong;
@Override
protected void onCreate(Bundle ankursingh) {
// TODO Auto-generated method stub
super.onCreate(ankursingh);
setContentView(R.layout.starting);
oursong = MediaPlayer.create(Splash.this, R.drawable.splas);
oursong.start();
Thread timer= new Thread(){
public void run(){
try{
sleep(5000);
}
catch(InterruptedException e){
e.printStackTrace();
}
finally{
Intent openStartingPoint= new Intent(Splash.this,main.class);
startActivity(openStartingPoint);
}
}
};
timer.start();
}
@Override
protected void onPause() {
// TODO Auto-generated method stub
super.onPause();
oursong.release();
finish();
}
}
3. Now let’s understand the code:
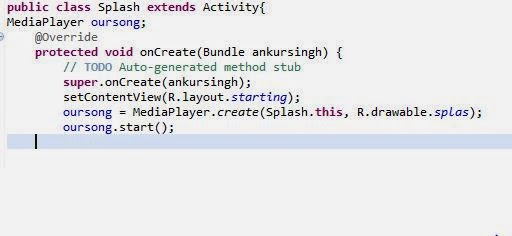
Here, we are setting the layout file starting.xml. We declared a ‘MediaPlayer’object to run our mp3 file. Oursong.start()function will start the music.
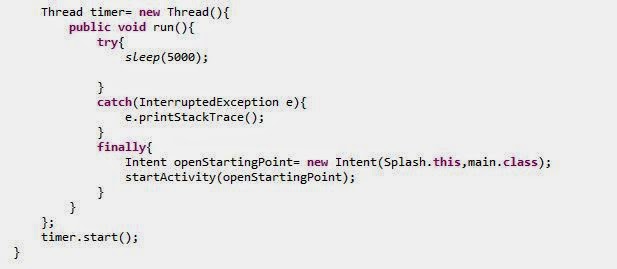
Threading is used to run many background processes. Here we are using thread to wait for five seconds before staring another activity. Intent helps to start another activity.

Here oursong.finish()function will stop the song whenever an activity will be closed.
Editing AndroidManifiest.xml file
AndroidManifest.xml file contains all the activities used in the project so we need to include the splash screen activity too in the AndroidManifest.xml file. Copy the below code in your android manifest file-
<?xml version="1.0" encoding="utf-8"?>
<manifest xmlns:android="http://schemas.android.com/apk/res/android"
package="com.example.tutorial_2"
android:versionCode="1"
android:versionName="1.0" >
<uses-sdk
android:minSdkVersion="9"
android:targetSdkVersion="9" />
<application
android:allowBackup="true"
android:icon="@drawable/ic_launcher"
android:label="@string/app_name"
android:theme="@style/AppTheme" >
<activity
android:name=".Splash"
android:label="@string/app_name"
android:screenOrientation="portrait" >
<intent-filter>
<action android:name="android.intent.action.MAIN" />
<category android:name="android.intent.category.LAUNCHER" />
</intent-filter>
</activity>
<activity
android:name="com.example.tutorial_2.main"
android:label="@string/app_name" >
<intent-filter>
<action android:name="android.intent.action.MAIN" />
<category android:name="android.intent.category.DEFAULT" />
</intent-filter>
</activity>
</application>
</manifest>
Run the code in emulator or in your android mobile and see the results.
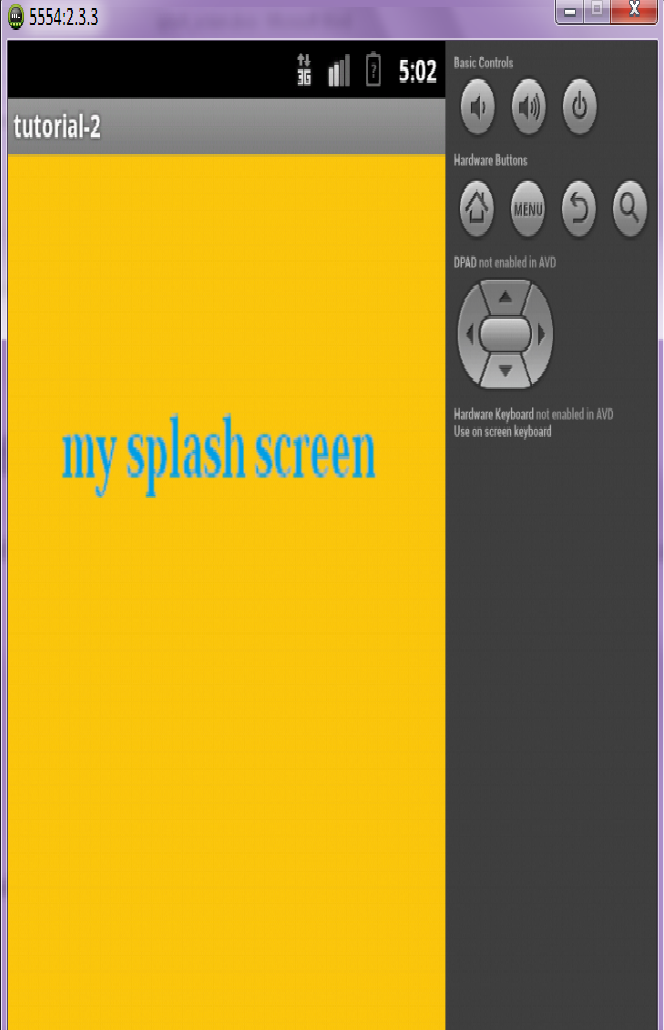
Guys, that’s it your splash screen app is ready. We learned something new and interesting. Go and try to make better looking splash screens. In our next tutorial we will learn about button click activity and will make a good add, subtract app.
(*note: please see the last tutorial to learn how to add the others files, in case you are in this blog first time.
)
Hope you understood the tutorial please take a minute to share and like the post, if you find this tutorial useful. In case you get any problem feel free to comment.
feels nice... gonna try it... :)
ReplyDeleteThanks
You should be using handler's postDelay instead of using Thread.sleep();
ReplyDelete@Override
public void onResume(){
super.onResume();
(new Handler()).postDelayed(new Runnable(){
public void run(){
// Do something here...
SplashScreen.this.finish();
}
}, LAUNCH_INTERVAL);
}
This is a horrible idea/practice. Per Android guidelines you shouldn't be displaying splash screens in your apps. You definitely shouldn't be doing them this way.
ReplyDeleteThe only reason an app should do this is if it is imperative to download necessary information before launching your first screen (you should cache your data so you don't need to do this). If you simple input a timer, you aren't guaranteeing your data will be available when your new activity is launched... and your app will crash if it isn't.
This was a terrible idea iOS developers had for shitty coding. This is an even shittier implementation of it. DO NOT DO THIS!
Really nice post! you are Genus!
ReplyDeletei am here at: http://wowophoto.blogspot.com/